Tuesday, February 24, 2009

How to Fit a Picture into an Irregular Frame (or any frame!)

The first thing you need to make sure of is that your frame and photo are on their own layers. Of course, I put everything on it's own layer to make editing easier. Then:


  • Activate your frame layer

  • Choose your magic wand tool

  • Click the main photo area (you should see marching ants in the part of the picture you want to keep)

  • Right Click; Select>inverse

  • Activate your photo layer

  • Hit delete

This should delete all of the picture except what was inside the frame.

Love, Renee

Monday, February 23, 2009

4Shared and viruses!

I'm sure you have heard about it over the last week or so.. but apparently 4shared has more in store for you than just free kits and quickpages! Read More Here

I personally have seen my anti-virus program stop 2 trojans in the last month. I do run 2 anti-virus programs (updating daily) and a malware program every day so I know my system is safe, but it sounds like these new ones are getting by and into other's PCs.

My husband is planning on reformatting my HD this week (we were on planning it anyways) and I have moved all of my important stuff to the extra HD I have.

I don't want anyone to be scared of DLing from me, so I have made an account at box.net (I suggest you do too). Like the posters above, I too believe it is coming through ads at 4shared and not through DLing. I have had that one ad pop up that pretends it is an anti-virus program more than once (I simply shut down my PC) and some other really strange (and pornographic) ads have popped up there. Box.net has no ads (at the moment).

I also do not want to be responsible for wiping out my husband's PC! My PC is one thing.. but if it happens to his he will be really angry!

Anyways.. be safe. I would recommend not DLing anything from 4shared and moving your stuff to another place. Also run your AVs and even have grisoft check yours out online.

Please note: I have had no complaints with any of my things, this is simply a preventative measure!

PS: another good thing to do is to make sure your popup filter is ON!

EDIT 3/3/09: apparently there is a bandwidth limit on box.net so I will include the 4shared links. Use firefox if you dont want troubles (although Ive not had any in the last week from 4shared).

Love, Renee

Friday, February 20, 2009

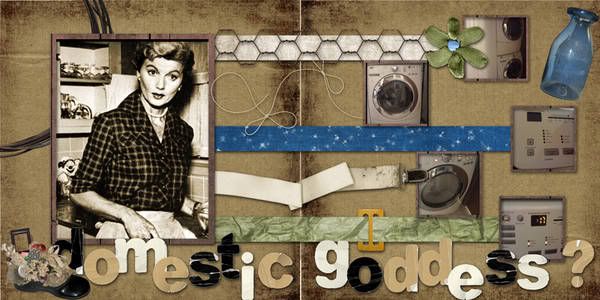
domesticG

Click to view entire layout!


I did this double page layout for the February Template Challenge at DSO hosted by teriann hanks.
The kit I used is from Andrea Dickinson and the alpha from Sir Scrapalot Designs

This is kind of out of the box for me.. thought I'd try something new with a grungy look to show off my new washer and dryer! and that's not me BTW haha that's Mrs June Cleaver herself - the original domestic goddess!

See my post on Made by Renee about Joaquin Phoenix and the Dosmestic Goddess!

Love, Renee

Sunday, February 15, 2009

Random Photoshop Brush Tips

from Obsidian Dawn:

You know how the grass that comes with Photoshop fluctuates in color, each time that you use it? You can do that with any brush that you want! Here’s how.

  • Hit F5 to bring up your brushes tab
  • Choose “Color Dynamics”
  • One way to control the color is to choose two colors for your foreground and background colors. In the case of a blade of grass, say… light green and dark green. Then set the “Foreground/Background Jitter” bar somewhere between 25-75%. When you use your brush, it will now vary in color between the foreground and background colors that you chose!

Another way (or you can do the former and then ALSO do this) is by using the Hue, Saturation, and Brightness Jitter sliders.

  • Hue will change the color itself. Set it at about 10%, and your green will become both a blue-green and a yellow-green sometimes.
  • Saturation will change the intensity of the color. Set it at 20% or so, and your green will switch between a bright, vivid green to a slightly grayed-out green.
  • Brightness will change the darkness of the color. Set it at 20% or so, and your green will range between a light green and a darker green.


Play around with these settings, and you can achieve all kinds of color variations!

Other Brush Tips from Obsidian Dawn:

Under Brush Tip Shape Spacing: This will make the brush closer together or farther apart

Under Shape Dynamics Size Jitter: This will make the size vary more or less

Minimum Diameter: This will dictate the minimum size that the brush will be (as its varying in size)

Under Scattering Scatter: This makes the brush scatter about more or stay more along the path that you’re painting

Under Other Dynamics Opacity Jitter: This makes the brushes vary in opacity as they are painted - more or less

Love, Renee

Friday, February 13, 2009

Freebie Quickpage!


I thought I'd make a QuickPage to go with the Feb DSO Colour Challenge (click picture to enlarge). Of course, my little kit is still available for download (see this post).

download the QP from it's new home on box.net and enjoy! (4shared link)

Love, Renee

Wednesday, February 11, 2009

3 Column Blogger

Say - did you notice I changed my blog? I made it 3 columns.

Here's how you do it. Make sure to adjust your margins too.

After setting it up, I had to change my blog background to be wider. It is best viewed in 1024+ resolution.

Of course you can still read all my blathering and silliness in other resolutions.. but if you want to change yours, just right click your desktop > Properties >Settings. Then slide that little bar around until you get the resolution where you want it.

Thanks for visiting me.. and feel free to grab a blinkie! They are on the lefthand side.
Love, Renee

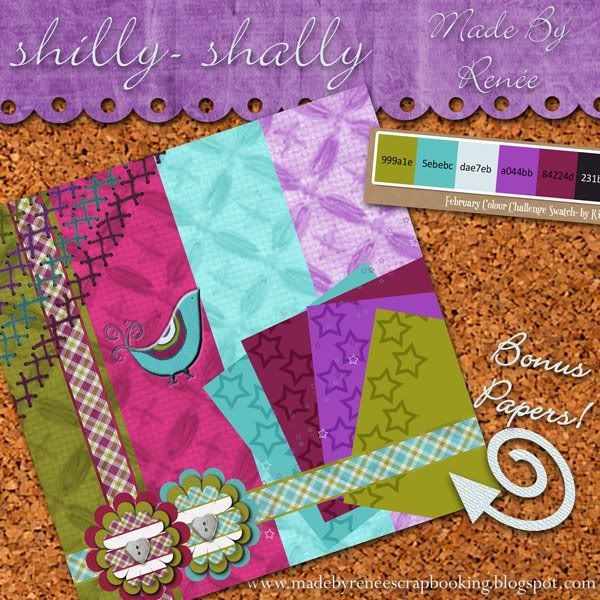
Freebie and a challenge!


click the preview to see it up close and personal!

I am so indecisive - I can never make up my mind! I made so many things to go with my DSO color challenge (led by kimb) kit that I had a lot of trouble cutting it down! Because I'm so shilly-shally, that's what youre getting!

Not only are there 4 soft fabric papers, 5 fishbone stitching, 2 flowers and 2 ribbons.. but I'm throwing in my favorite birdie, 4 star papers, a star arrangement and 2 bows (not shown on preview)!


Now I am in love with the fabric papers! Click on the preview below to take a closer look at the detail:


I know it's a bit different from the preview in my previous post, but maybe I will give that stuff away another day this week!

EDITED: Download it from it's new home at box.net (4shared link)

peace, love and honeybees.. whatever that means!

Love, Renee

Tuesday, February 10, 2009

Fried Apples Like Cracker Barrel


This is for the Recipe Challenge at DSO. It is being hosted by Lynn.

Love, Renee

The Great Exchange


go check out The Great Exchange challenge at DSO! Its being hosted by Shannon.

The Great Exchange - February 2009 Join us each month as we create items to
share! Create one item to share and receive ALL that month's creations in
return. We will feature a different Designer and/or product each month


sounds fun doesn't it? and you can get my cute little quickpage made with kimb's Fresh Posey!

Love, Renee

Monday, February 09, 2009

New Blinkies


The top blinkie is 150x50 pixels - perfect for forums etc.

I told you they could be pretty :)

Love, Renee

Sunday, February 08, 2009

Puppy Love

puppy-love

This is for Doodle's Dare Feb challenge at DSO.

Here is your DARE.

You will need to complete a layout using all of the following. The
theme is "LOVE"

2 photos

3 different ribbons

4 papers (they can be solid or pattern)

2 frames

journaling

stitching

1 felt element (anything felt)

Now remember, you can add to this list, but you can not take away
or replace. You have to use everything in this list on your layout.

I used:

Shazbutt I luff you heart paper

andrea dickinson Delightful pink paper (posting bonus)

The Queen and The Princess Designs: felt heart, teal (flower shaped) ribbon

WenchdGrafix Designs saucy teal dot paper

crops2dawn crinkly teal ribbon

beth long pink ribbon and pink heart paper (posting bonus)

LPand3Dogs heart frames

Dani Mogstad pinky alpha

PS I originally forgot to add journalling to my LO.. so the one on the forums has that added.

Love, Renee

Element Sizes

I found this info:


Brads, eyelets, corners, other small elements - 3x3 canvas
Tags - 4x3 canvas; several minitags can be put on the same canvas.
Alphas - 2x3
Monograms and Coasters - 5x5
Frames - rectangle/oval - 5x7
Frames - square/round - 5x5 or 6x6
Fibers, ribbon, necklaces, belts - 16x16 and either 1, 2, or 3" in width, depending on the size you're making. 16x16 allows for corner to corner on the diagonal, but 13" is a good size to use as well.

Remember, you want to make your elements larger than the size they will be
used, to ensure that when said elements are reduced in size they will still have
the same detail.

posted by vkimmycat at Digi Kreations

Love, Renee

Beginner Blinkie Tutorial for PSE

This is my first blinkie ever.. it isn't exactly what I would use on my blog, but I can tell you how it was done and I know you can make something beautiful!

1. Open a file. File>New. This one is 200 pixels X 80 pixels.. 300ppi, RGB. you can use transparent background if you like.

2. The bottom layer = the first image (frame) to be seen. For my example it is the Made By Renee with stars.

The first time I tried this I got it mixed up and kept putting my first image on top.

3. go to Layer > New > Layer. You can add another image or text on this layer. If you add text you will want to merge that with a colored layer to make a background. In my example I made a white background to match my first frame so that it looks like it is blinking and not just changing frames.

4. Keep making new Layers until you have all the images you want. In my example I have 7 layers. Made By Renee, stars layer, blink1, blink2, blink1 copy, blink2 copy and Made By Renee to end it (I did this so that image would stay up a little longer).

The blink1 image is a copy of my stars image with a few stars colored in yellow. My blink2 image is just a duplicate of blink1 with different stars colored in.

5. Now that you have it all done, click File > Save for Web.

6. On this page under Settings click GIF in the drop down box and also checkmark the animate box.

7. Go Down to the bottom of that screen (once you have clicked animate up top, the animation area will light up) and change the loop time to 1. You dont want to leave it on .2 because then your blinkie will go faster than the speed of light. And as Woody Allen says, that is: "..certainly not desirable, as one's hat keeps blowing off." hehe

8. Go to the top and click OK. save it to your computer and you have a new blinkie. You won't see it blink until you put it on a webpage or preview it in a post on blogger.

Hopefully I will learn more about Blinkies this week and be back with a more advanced tutorial (and lovely blinkie for my forum siggy!). I am looking forward to making a more "scrappy" looking one.

PS: I used Bickley Script for the font and Flowing Stars for the brush

Love, Renee

Saturday, February 07, 2009

Freebie from Andrea


Andrea has this freebie on her blog today - go check it out!


This next one is from Beth - look how sweet!


Don't forget to check out the other blogs on my sidebar, blogger lets you know when they have been updated last!

Love, Renee

Thursday, February 05, 2009

Scraplift Challenge

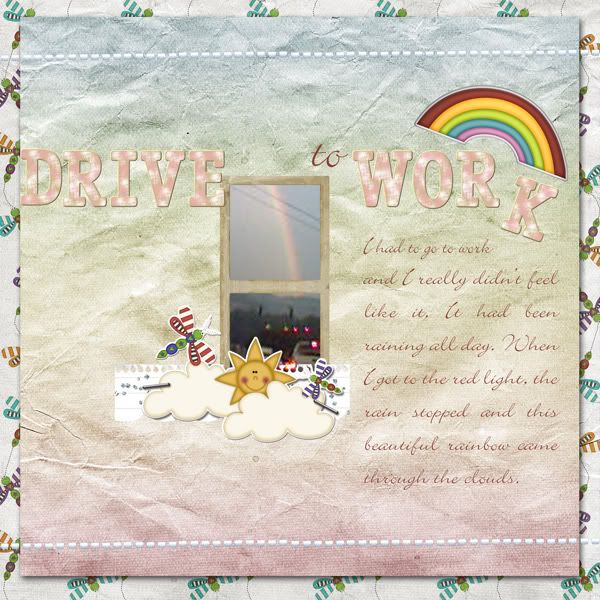
Drive to Work


I made this for the Scraplift Challenge at DSO (click the image to enlarge). It is being hosted by Beth Long and she has not one posting bonus but TWO!

Scraplift from Lani's 15 Weeks

she used a bright, patterned paper in her background... and toned it down by using a solid paper on top of that. I toned it down by using a muted rainbow color. I also used stitching and the minimilist use of embellishments. the font looks a bit like my own handwriting.. and I used an alpha set in my page too. My picture was one I didnt think could be used for scrapbooking.. it was taken on an old camera phone.

mommyscraps made the frame
LiviaY Designs Happy Day kit for the papers and embellishments.
pink chipboard alpha by sjs

Love, Renee

Quote Challenge

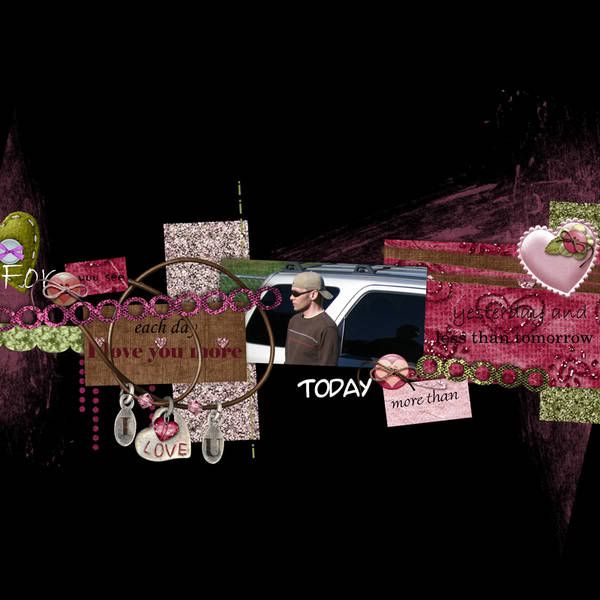
I-Love-You-More-Today

Please click for entire view


I made this layout for the Quote Challenge over at DSO (click to enlarge). It's being led by Andrea Dickinson and she has a super cute posting bonus just for playing!

Cookie Template: Sweet Shoppe (Setiadji)
Brown paper, pink heart and button embellishments, pink papers, necklace: LiviaY's Forever Mine kit
Green heart: Shazbutt for feb DSO colour challenge
Gold and pink sparkle papers used for chain embellishments: Crops2Dawn for the feb DSO colour challenge

Love, Renee

Wednesday, February 04, 2009

Blog Design

This was the first time I ever made a blog background or header, please let me know what you think!

special thanks to Livia!

I think I will try to do a three column blog next.

Love, Renee

Monday, February 02, 2009